

A Clutch of Fresh Coverstitch Tips | The Button Jar
Please note: with all these tips, I cannot recommend enough practising them BEFORE you try them on your project.
Well, it’s been a minute in the making, but I’m so excited to write up this handful of coverstitching tips! For new folk around here, I’m a brand ambassador for Bernette, as part of Bernina. Since 2018, Bernina have been loaning me a Bernette B42 Coverstitcher machine to try out and review as I use it on various projects. Last year, I had the very great pleasure of hanging out with Anna from Bernina HQ, Wellington for some extra training.

Anna is an incredible sewing machine technician and sewist, with an amazing contemporary quilting practice. She’s also been working on the most exquisite wedding jumpsuit for her leap-day wedding on February 29th. Go check out her process on @runningwithstitches.
Over the course of a morning Anna walked me through troubleshooting some of the things that have remained a little problematic for me with my B42 Coverstitch. I hope you enjoy this clutch of fresh coverstitch tips; feel free to ask me in the comments to clarify anything that’s confusing. I will answer them when I’m back from my van-life holiday.
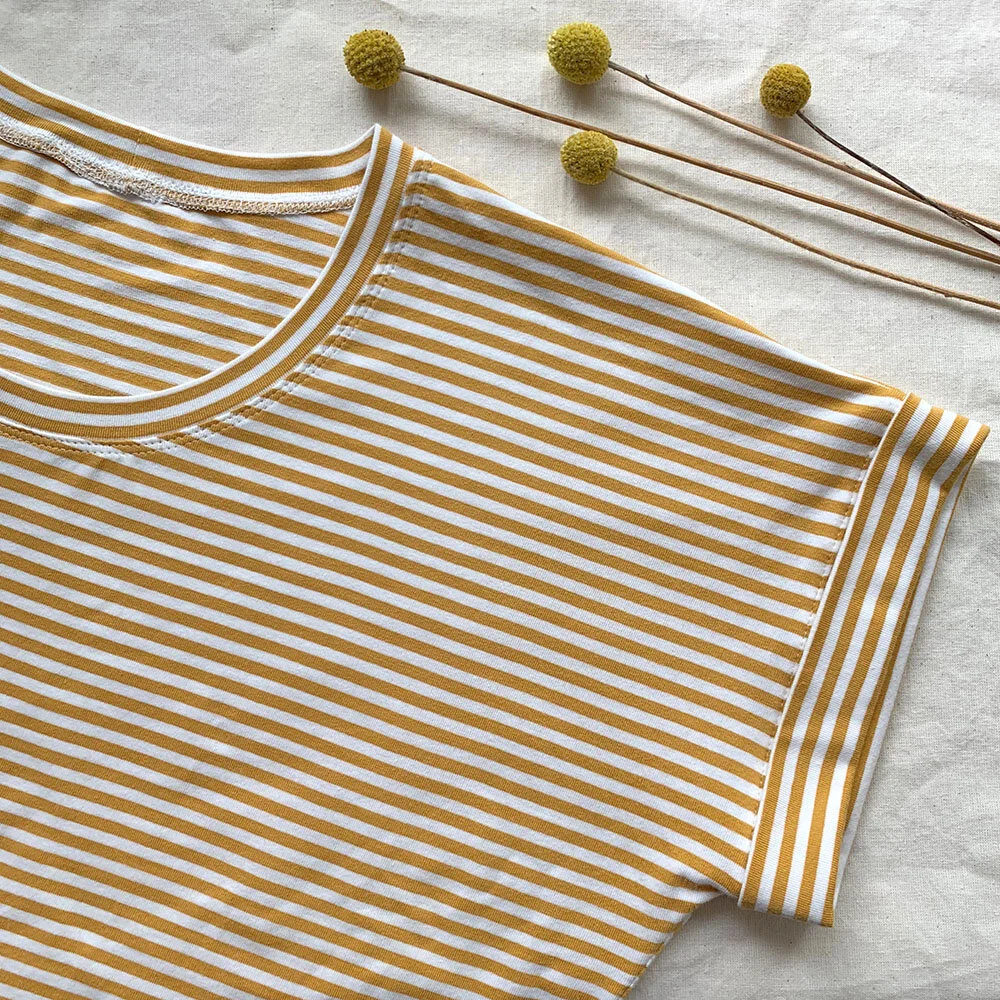
You can click on any of the photos to make them larger if you want to see techniques more clearly. But, full disclosure: I had to stage a couple of the below illustrative process photos after I finished the associated projects, so you might notice some irregularities, like thread colour in the machine. Please forgive these, and enjoy the tips themselves :-)
And now, on to the tips!
Catching the Hem in the Stitch Line
Trouble: This is a little one, but I sometimes struggle with not being able to make sure that I’m catching my hem in the coverstitiching.
Reason: With a coverstitcher you have to sew while looking at the outside of the garment, and it can be tricky to be sure that things are staying straight and tidy under there. I’ve sometimes finished a hem, pulled it off the coverstitcher and found that at some point the hem has gone awry, it hasn’t caught in the stitching, and I have to redo the whole hem. GAH!
Shoot! Although I’m sure with practise this would cease to be an issue for me, I’ve decided to simplify my life. Now, I cut a deeper hem than required, coverstitch the hem with the confidence of someone not worried about not catching the hem. (You don’t need to have quite as deep a hem as I’ve photographed below, but it was best for the photo.)
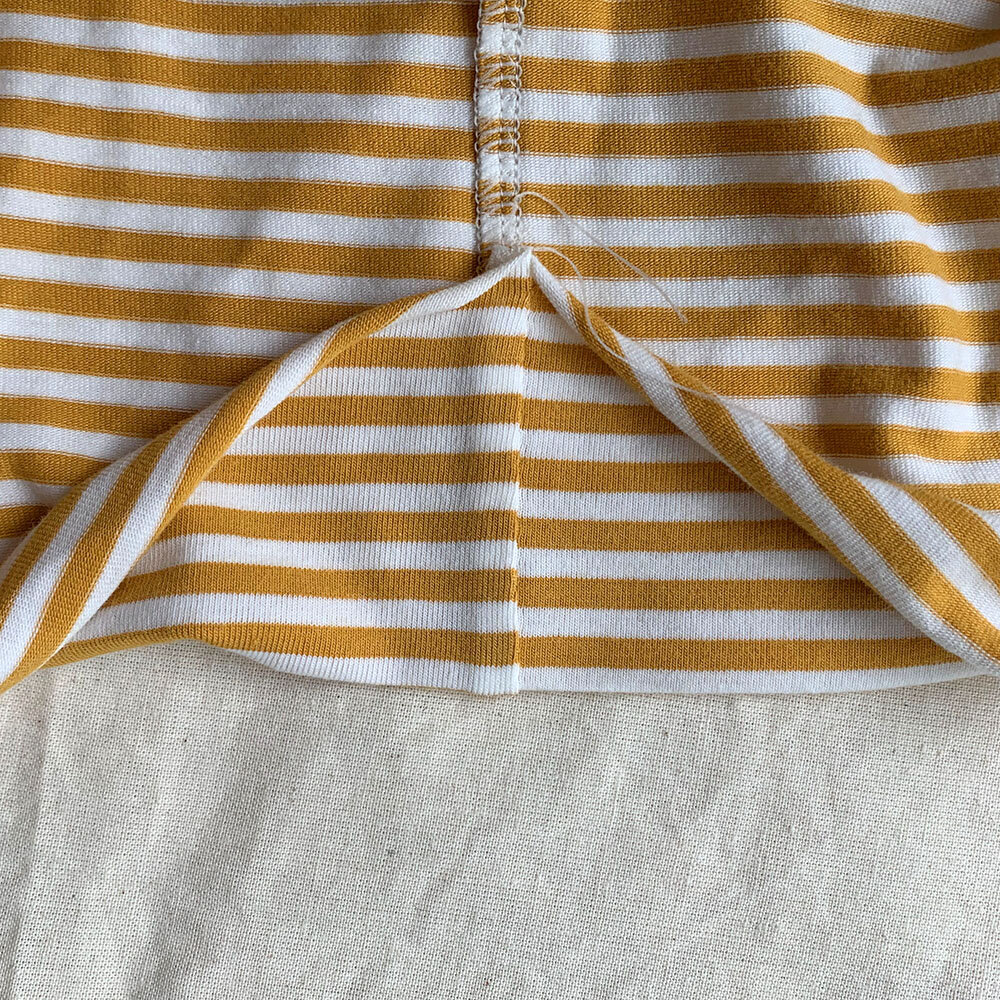

I then carefully trim the excess hem at the stitch line using my duck-billed scissors. Hey, presto! My perfectionism is sated in a simple, low rick-manner. [Satisfied sigh.]

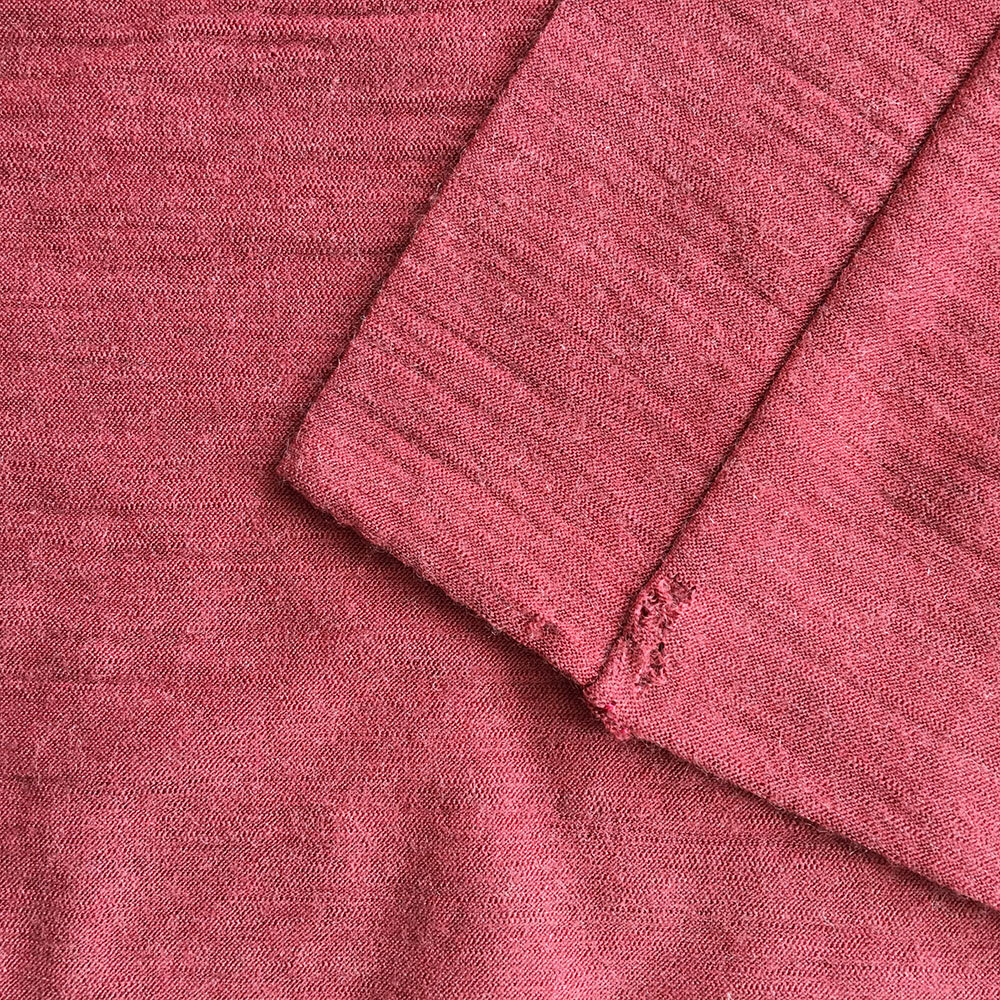
Hem carefully trimmed back to the coverstitch line
Bunched Stitches Around Seam-Humps
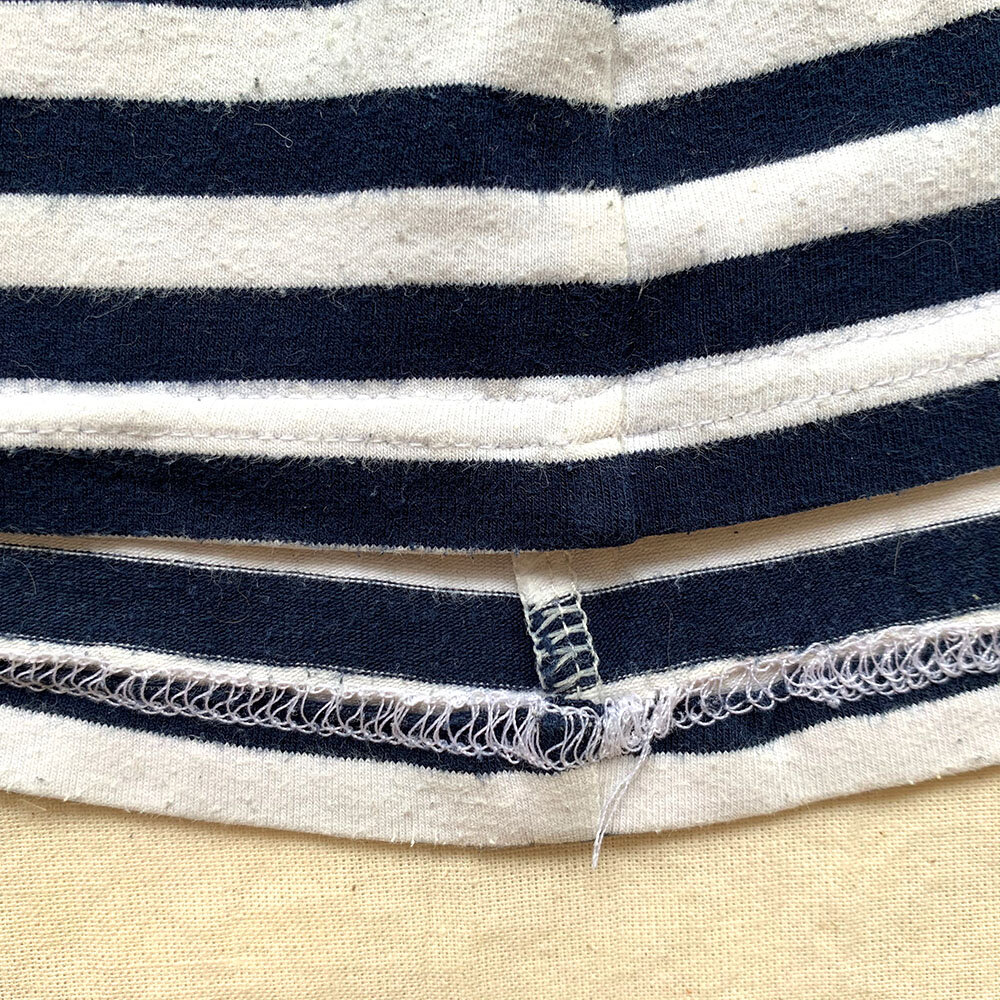
Bunched-up stitches around the side seam. (Please excuse old tee with lots of pilling.)
Trouble: My coverstitcher struggles to get over the bump that’s created when seam allowances are folded on top of each other. The stitches bunch up and the foot doesn’t want to move over the bump.
Reason: Basically, sewing machine feet don’t really like going uphill, and I very much understand that! They don’t mind going downhill so much—understand that too!—so I usually encounter this problem at the beginning of the bump, and not at the end of the bump. To fix that problem, you want to make either the surface you’re coverstitching more level, or the foot itself level.
Shoot! I have two solutions for this. You can try using them both, or you can see how you go with one or the other. If you want to try both, then do them in this order:
Part one | Make the surface more level
The effect of this is to distribute the seam allowance into a smaller bump than when the seam allowance is stacked on top of itself. Here we go! Press your hem up. At the crease line, cut the seam allowance being careful to not cut through the stitch line. And finally press the seam allowance below the cut in the opposite direction from the seam allowance above the cut. The bulk is now evenly distributed, ready for coverstitching.


Part two | Make the foot itself level
This is very simple and can be used on all your machines: use a hump jumper as you reach the bump of the seam allowance. So, when you get close to the seam allowance hill, stop. Put your needles down. Lift the foot, and place the hump jumper behind the needles. Foot down, and keep coverstitching. What should happen is the foot is evenly balanced between hump-jumper and seam allowance without having to go uphill. The machine will then happily sew down the seam allowance hill.
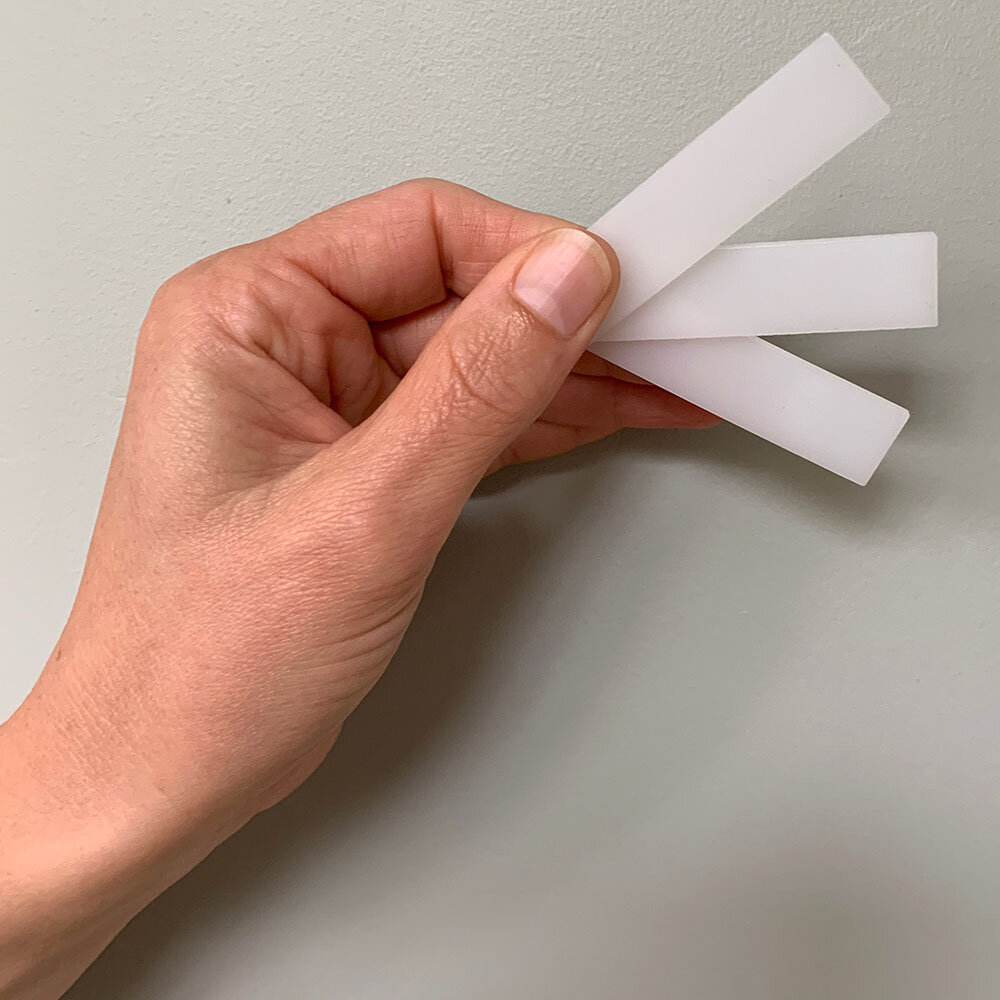

Some companies provide a hump jumper with the machine, but if you weren’t provided with one, you can make your own by using a heavy piece of card, or sticking a few lighter pieces of card together.
Difficulty Feeding Fabric at the Beginning of the Seam
A little coverstitch carnage…
Trouble: If you’ve been watching my sewing journey for a while, you might remember I hit a massive snag when I was coverstitching my Blackwood Cardigan. There was much wailing and gnashing of teeth when I could not get the coverstitching to start—as the pattern directs—at the bottom edge of the cardigan. The result was … not pretty.
Reason: I think there’s a few things going on in this, but whether it was one of these factors or all of them in combination, this solution should sort out all of them. First, coverstitchers don’t really like sewing into nothing, so this sort of task—starting at a very precise point on the edge of a garment—was inherently difficult. Second, it could have been that the press foot pressure was too high or too low meaning that edge of the merino couldn’t easily move between the foot and feed-dogs. And in addition, there is the unbalanced-foot-trying-to-climb-uphill issue of the previous tip.
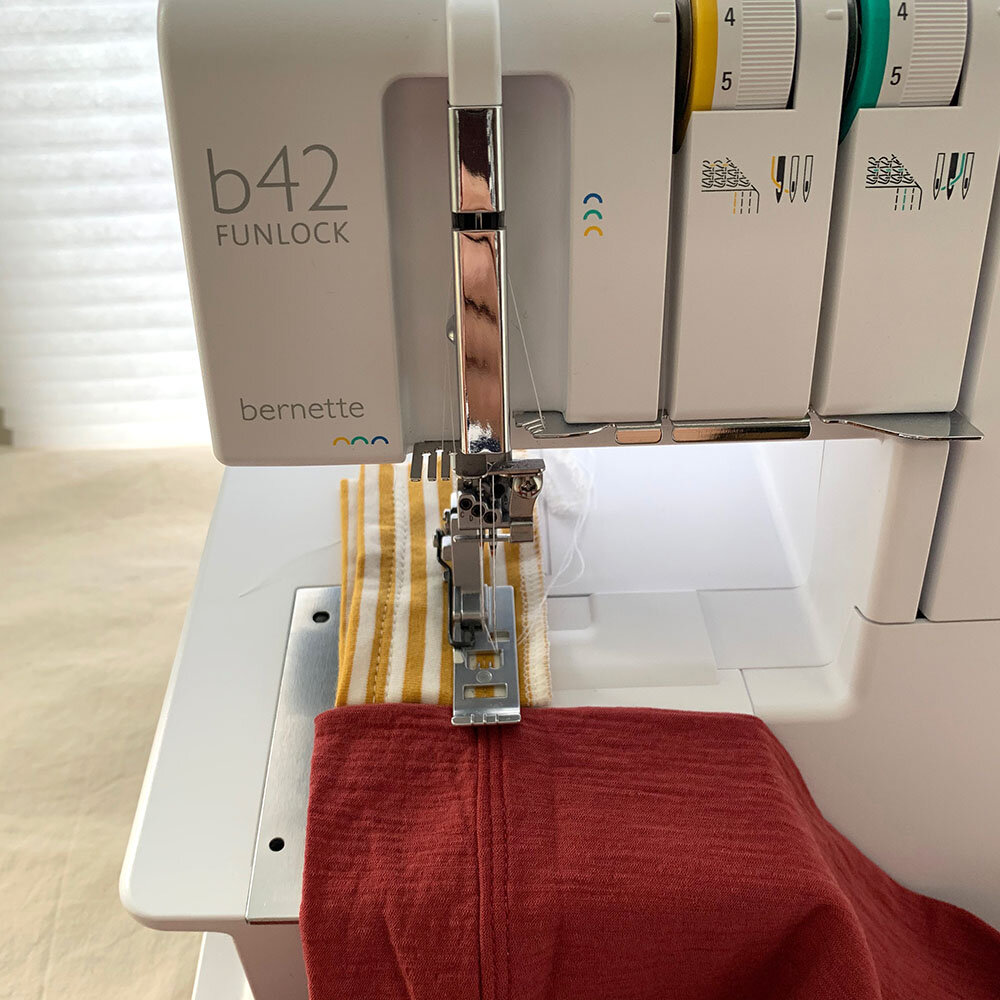
Shoot! This is such a great trick, my brain comprehensively exploded when Anna showed it to me. Start sewing on a folded piece of waste fabric. As the waste fabric feeds through, abut your garment up to the waste fabric so the machine just moves directly onto coverstitching your garment. BOOM! The machine is always sewing into something: check! You’re not fighting with problematic pressure at the edge of the garment: check! Finally, the foot is balanced and not trying to walk uphill: check!

So succinct! So simple! So brilliant!
Problems with Releasing the Thread at the End of Coverstitching
Trouble: I’ve had a lot of problems with the technique suggested for releasing the thread when I’ve finished coverstitching a seam. The recommended technique is to lift the front of the foot up and, using tweezers, pull a length of thread from the needles, and then remove the garment in a diagonal and backwards motion. I just found this technique very hit-and-miss. The thread might not pull out easily meaning that it was pulling at the garment, and all sorts of other things that made this really buggy.
Reason: … I’ll level with you: I have no idea! But I do have an alternate technique if you struggle with this, too.
Shoot! When you reach the end of the hem you’re coverstitching, stop. Then, using the wheel, move your needles forward into a downward position. Then move the wheel in the reverse direction, bringing the needles back up. Lift the foot and then remove your garment in a back and diagonal direction. For some magical (or mechanical) reason that I don’t understand—but Anna does!—this technique releases the thread.
If the above writing is confusing, instead, please—do—watch this dinky little video, and sound on for the quality elevator music I backed it with!
And there we have it! I hope these are helpful on your coverstitching journey!
(I have written this blog post based on honest experiences I’ve had with the Bernette B42 Coverstitch machine. Although Bernina have loaned me the machine, I have not received any payment for this blog post.)


